|
|
| Line 5: |
Line 5: |
| | | | |
| | ==Respawn== | | ==Respawn== |
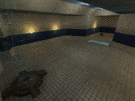
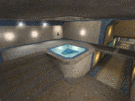
| − | There are two respawn rooms; one is near the Flag Room, and the other is near the Balcony. The transparent floor will heal you to the max, repair your armour to 100%, and give you max ammo. The backpack in respawn contains grenades. In the back of the respawn room is a teleporter that leads to the other respawn room. They're very useful for catching up to an enemy with your flag. | + | There are two respawn rooms; one is near the Flag Room, and the other is near the Balcony. The transparent floor will heal you to the max, repair your armour to 100%, and give you max ammo. The backpack in respawn contains grenades. In the back of the respawn room is a teleporter that leads to the other respawn room. |
| | | | |
| | {{Image_Gallery | | {{Image_Gallery |
| Line 13: |
Line 13: |
| | | | |
| | ==Flag Room== | | ==Flag Room== |
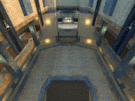
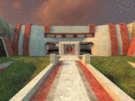
| − | This is an enormous room that has the flag in the very back. A gate blocks access to the flag, but if the switch in the Laser Control room is pressed, the gate will open for 60 seconds, allowing attackers to grab the flag. This room has a respawn/resupply room, and entrances to the Laser Control (to the right of the gate, facing the gate), the Perilous Passage (from the bottom) and the Balcony (the catwalk parallel to the one that leads to the respawn room). The sheer amount of entrances make the Flag Room somewhat difficult if you don't have enough defenders.
| |
| − |
| |
| − | Once the gate is open, attackers should focus on getting the flag out of the room it's in. Once somebody gets it, he should throw it forward (C key by default), hopefully making it land near the entrance to the Perilous Passage. Once that's out of the way, they should focus on getting it out of the base by any means possible. Once the flag is out of the enemy's Perilous Passage, it is essentially theirs.
| |
| − |
| |
| − | Defenders should focus on placing Sentries and "heavy" classes at chokepoints, such as the hall that connects the Flag Room to Laser Control and the two pillars that are near the flag. If the gate is opened, everyone playing defense should go to the Flag Room and cover every entrance. It is vital that the enemy doesn't even touch the flag. Once the gate closes, defenders should return to their regular positions.
| |
| − |
| |
| | {{Image_Gallery | | {{Image_Gallery |
| | | igimage1=[[Image:Ff_openfire0065.gif|135px]] | | | igimage1=[[Image:Ff_openfire0065.gif|135px]] |
| Line 27: |
Line 21: |
| | | | |
| | ==Laser Control== | | ==Laser Control== |
| − | The Laser Control has a switch that opens up the room containing the flag. Once the switch is pressed, a message will appear on everybody's screen, telling everyone that security is down for that team. This tells the enemy team that they can now focus on grabbing the flag.
| |
| − |
| |
| − | Attackers should focus all of their efforts on hitting the button. They shouldn't attack defenders unless they're in the way. Remember: the button only needs to be touched in order for the gate to go down.
| |
| − |
| |
| − | Defenders will want to prevent attackers from hitting the switch in the first place. Pipe Traps, HWGuys in corners, and Soldiers posted everywhere (especially right in front of the switch) is an effective way to prevent attackers from hitting the switch in the first place. Grenades of all types are effective, as the area is very small, assuring that a target will get hit by a grenade no matter where they are.
| |
| − |
| |
| − | Snipers can be effective on the catwalk overlooking the Lower Corridor. Even if a Sniper doesn't kill a person running through the passage, his laser dot scanning the floor and ground can scare off other attackers, making them run through the Perilous Passage, where your other defenders can slaughter them. If your Sniper manages to make a few kills or tag a few people running through, the more the merrier.
| |
| − |
| |
| | {{Image_Gallery | | {{Image_Gallery |
| | | igimage1=[[Image:Ff_openfire0058.gif|135px]] | | | igimage1=[[Image:Ff_openfire0058.gif|135px]] |
| Line 41: |
Line 27: |
| | | | |
| | ==Lower Corridor== | | ==Lower Corridor== |
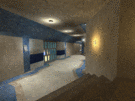
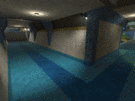
| − | The Lower Corridor connects the Outside to the Balcony and the Laser Control Room. It's tight passages make it an excellent area for Pipe Traps and [[Soldier]]s.
| |
| − |
| |
| − | Attackers can use this place to choose which route they'd like to take. If they need to open the gate, they can charge into the Laser Control room and hit the switch, or they can go through the Balcony and the Flag Room to get to the Laser Control room.
| |
| − |
| |
| − | Defenders should note that attackers like to split up between this area and the Perilous Passage in order to open the gate or grab the flag; make sure there's always at least one person that can get here quickly.
| |
| − |
| |
| | {{Image_Gallery | | {{Image_Gallery |
| | | igimage1=[[Image:Ff_openfire0056.gif|135px]] | | | igimage1=[[Image:Ff_openfire0056.gif|135px]] |
| Line 55: |
Line 35: |
| | | | |
| | ==Balcony== | | ==Balcony== |
| − | The Balcony is the main spot for Snipers. It's elevated window makes it easy to duck to avoid rockets and nails, yet still get effective shots on enemies. The nearby respawn room makes it easy to resupply if you take a hit or two, or run out of ammo.
| |
| − |
| |
| − | The Balcony is often used an an alternate way for attackers to get to the Flag Room. Some attacker forget about it and try to go through the Laser Control room or the Perilous Passage to get the flag. While there's a respawn room right at the start (from the Lower Corridor), enemies don't spawn in it a lot, they shouldn't worry about an unexpected enemy running into them.
| |
| − |
| |
| − | Defenders usually tend to ignore this area, unless they're Snipers. If the Defenders have an Engineer, he should try to have a filled [[Dispenser]] placed near the area that connects the Balcony and Flag Room. An enemy will likely run touch it, giving him a chance to blow it up (and the attacker). If not, he should occasionally take a glance into the Balcony and see if somebody is coming.
| |
| − |
| |
| − | If there are Snipers with the defenders, make sure that they can switch between the Sniper and Auto Rifle quickly. An attacker might slip though him and run through the Balcony, killing the Sniper in the process if he's caught without his Auto Rifle.
| |
| − |
| |
| | {{Image_Gallery | | {{Image_Gallery |
| | | igimage1=[[Image:Ff_openfire0053.gif|135px]] | | | igimage1=[[Image:Ff_openfire0053.gif|135px]] |
| Line 73: |
Line 45: |
| | | | |
| | ==Perilous Passage== | | ==Perilous Passage== |
| − | This is the water passage that connects both of the Flag Rooms. There are two entrances to this area Outside; one is under the bridge, and the other is located on the center left and right. The entrances on the side have a team-coloured pillar behind them, making it easy to spot the side entrance.
| |
| − |
| |
| − | Attackers should frequently use this passage to get to the flag. Concjumping and similar movement techniques (such as [[Pyro Jump]]ing) should be used to clear the passage before defenders can catch up to you. If somebody tries to attack you, run by them. An extended fight in the Perilous Passage will drain a lot of your armour and health, making it very difficult to grab the flag.
| |
| − |
| |
| − | For defenders, having a "heavy" class such as a Soldier and a Sentry pointing at it in the Flag Room side should be enough to take out most opponents. If they aren't dead, the defenders in the Flag Room can finish them off with ease.
| |
| − |
| |
| | {{Image_Gallery | | {{Image_Gallery |
| | | igimage1=[[Image:Ff_openfire0064.gif|135px]] | | | igimage1=[[Image:Ff_openfire0064.gif|135px]] |
| Line 85: |
Line 51: |
| | | | |
| | ==Outside== | | ==Outside== |
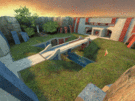
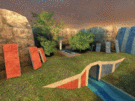
| − | The Outside area is fairly small. Be careful of [[Sniper]]s from the Balcony and the Perilous Passage. On the sides of the center is a hole that will allow you to access the Perilous Passage from another angle. A team-coloured pillar indicates what team's Perilous Passage the hole leads to. This area is too open to set up an effective defense; the tight halls of your base are much better for Sentries and Pipe Traps.
| |
| − |
| |
| − | Attackers can come into the enemy's base through the Lower or the Perilous Passage. A Scout can place a [[Jump_Pad]] near the bridge. Defenders ignore this area, so attackers only need to worry about enemy attackers taking potshots at them.
| |
| − |
| |
| − | Defenders can try to stop attackers here, but it's largeness makes it trickier to make successful hits on enemies compared to the tight corridors in the base. They should focus their effort inside the base, unless the flag has gotten out, but isn't in the enemy's base yet.
| |
| − |
| |
| | {{Image_Gallery | | {{Image_Gallery |
| | | igimage1=[[Image:Ff_openfire0060.gif|135px]] | | | igimage1=[[Image:Ff_openfire0060.gif|135px]] |
